搜索到
21
篇与
的结果
-

-
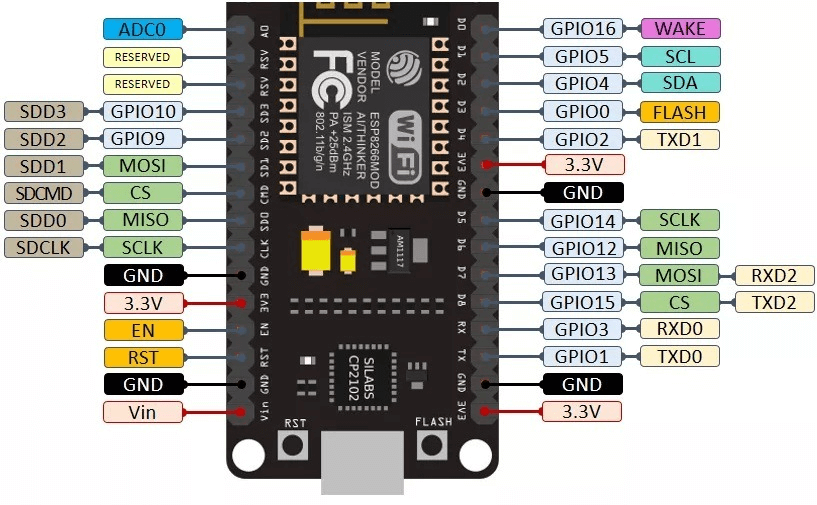
 ESP8266连接PCF8591外设的部分问题及解决方法 第一步: 在Arduino IDE中点击 工具>管理库>搜索PCF8591,安装Adafruit PCF8591的库包。第二步: 连接好PCF8591和ESP8266的IIC通信线。第三步: 在Arduino IDE中点击 文件>示例>Adafruit PCF8591 打开PCF8591的示例文件,上传运行即可。PCF8591示例文件:#include <Adafruit_PCF8591.h> // 设置VCC电压为5V,可更改为3.3V #define ADC_REFERENCE_VOLTAGE 5.0 Adafruit_PCF8591 pcf = Adafruit_PCF8591(); void setup() { Serial.begin(115200); while (!Serial) delay(10); Serial.println("# Adafruit PCF8591 demo"); if (!pcf.begin()) { Serial.println("# Adafruit PCF8591 not found!"); while (1) delay(10); } Serial.println("# Adafruit PCF8591 found"); pcf.enableDAC(true); Serial.println("AIN0, AIN1, AIN2, AIN3"); } uint8_t dac_counter = 0; void loop() { // Make a triangle wave on the DAC output pcf.analogWrite(dac_counter++); Serial.print(int_to_volts(pcf.analogRead(0), 8, ADC_REFERENCE_VOLTAGE)); Serial.print("V, "); Serial.print(int_to_volts(pcf.analogRead(1), 8, ADC_REFERENCE_VOLTAGE)); Serial.print("V, "); Serial.print(int_to_volts(pcf.analogRead(2), 8, ADC_REFERENCE_VOLTAGE)); Serial.print("V, "); Serial.print(int_to_volts(pcf.analogRead(3), 8, ADC_REFERENCE_VOLTAGE)); Serial.print("V"); Serial.println(""); delay(1000); } float int_to_volts(uint16_t dac_value, uint8_t bits, float logic_level) { return (((float)dac_value / ((1 << bits) - 1)) * logic_level); }{alert type="warning"}常见问题 上传程序后串口输出 Adafruit PCF8591 not found!解决:检查IIC总线和供电线是否连接正确使用该链接中的程序 ESP8266获取外设IIC地址 检查PCF8591的IIC地址,并把if (!pcf.begin()) { Serial.println("# Adafruit PCF8591 not found!");替换成: if (!pcf.begin(0x48)) { Serial.println("# Adafruit PCF8591 not found!"); //0x48是通过查询IIC地址的程序查询出的PCF8591IIC地址使用Wire.h库修改ESP8266的模拟IIC串口为其他GPIO#include <Wire.h>//导入Wire.h函数库 void setup() { //在上述程序的setup函数中添加Wire.begin(0,2);使用GPIO0和GPIO2作为IIC通信串口 Serial.begin(115200); while (!Serial) delay(10); Wire.begin(0,2);{/alert}
 -
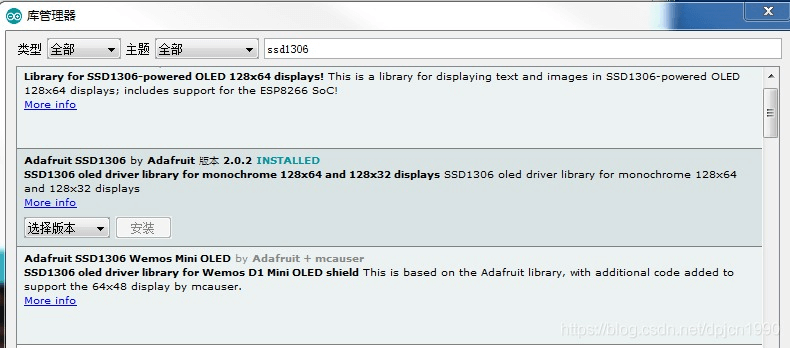
 ESP8266连接SSD1306 OLED显示屏 SSD1306安装驱动库Arduino IDE安装SSD1306驱动库文件 管理库中搜索并安装 Adafruit_SSD1306 库,如下图所示。 SSD1306像素排列OLED屏幕,最终都可以抽象为像素点阵,想显示什么内容就把具体位置的像素点亮起来。比如SSD1306就是一个128X64像素点阵。在坐标系中,左上角是原点,向右是X轴,向下是Y轴。ESP8266与SSD1306接线图SSD1306ESP8266VDD3.3VGNDGNDSCLSCLSDASDA{message type="warning" content="注:NodeMCU默认IIC通信串口SDA为GPIO4,SDA为GPIO5,如需切换其他模拟IIC串口,需调用Wire库进行切换。SSD1306的IIC地址可能与程序中默认IIC地址不同,需先扫描出SSD1306的IIC地址再进行修改。"/} 搜索IIC地址程序 Adafruit_SSD1306示例程序#include <Wire.h> #include <Adafruit_GFX.h> #include <Adafruit_SSD1306.h> #define SCREEN_WIDTH 128 // OLED display width, in pixels #define SCREEN_HEIGHT 64 // OLED display height, in pixels // Declaration for an SSD1306 display connected to I2C (SDA, SCL pins) // The pins for I2C are defined by the Wire-library. // On an arduino UNO: A4(SDA), A5(SCL) // On an arduino MEGA 2560: 20(SDA), 21(SCL) // On an arduino LEONARDO: 2(SDA), 3(SCL), ... #define OLED_RESET -1 // Reset pin # (or -1 if sharing Arduino reset pin) #define SCREEN_ADDRESS 0x3C ///<修改为自己用IIC搜索程序搜索的IIC地址 Adafruit_SSD1306 display(SCREEN_WIDTH, SCREEN_HEIGHT, &Wire, OLED_RESET); #define NUMFLAKES 10 // Number of snowflakes in the animation example #define LOGO_HEIGHT 16 #define LOGO_WIDTH 16 static const unsigned char PROGMEM logo_bmp[] = { 0b00000000, 0b11000000, 0b00000001, 0b11000000, 0b00000001, 0b11000000, 0b00000011, 0b11100000, 0b11110011, 0b11100000, 0b11111110, 0b11111000, 0b01111110, 0b11111111, 0b00110011, 0b10011111, 0b00011111, 0b11111100, 0b00001101, 0b01110000, 0b00011011, 0b10100000, 0b00111111, 0b11100000, 0b00111111, 0b11110000, 0b01111100, 0b11110000, 0b01110000, 0b01110000, 0b00000000, 0b00110000 }; void setup() { Serial.begin(9600); // SSD1306_SWITCHCAPVCC = generate display voltage from 3.3V internally if(!display.begin(SSD1306_SWITCHCAPVCC, SCREEN_ADDRESS)) { Serial.println(F("SSD1306 allocation failed")); for(;;); // Don't proceed, loop forever } // Show initial display buffer contents on the screen -- // the library initializes this with an Adafruit splash screen. display.display(); delay(2000); // Pause for 2 seconds // Clear the buffer display.clearDisplay(); // Draw a single pixel in white display.drawPixel(10, 10, SSD1306_WHITE); // Show the display buffer on the screen. You MUST call display() after // drawing commands to make them visible on screen! display.display(); delay(2000); // display.display() is NOT necessary after every single drawing command, // unless that's what you want...rather, you can batch up a bunch of // drawing operations and then update the screen all at once by calling // display.display(). These examples demonstrate both approaches... testdrawline(); // Draw many lines testdrawrect(); // Draw rectangles (outlines) testfillrect(); // Draw rectangles (filled) testdrawcircle(); // Draw circles (outlines) testfillcircle(); // Draw circles (filled) testdrawroundrect(); // Draw rounded rectangles (outlines) testfillroundrect(); // Draw rounded rectangles (filled) testdrawtriangle(); // Draw triangles (outlines) testfilltriangle(); // Draw triangles (filled) testdrawchar(); // Draw characters of the default font testdrawstyles(); // Draw 'stylized' characters testscrolltext(); // Draw scrolling text testdrawbitmap(); // Draw a small bitmap image // Invert and restore display, pausing in-between display.invertDisplay(true); delay(1000); display.invertDisplay(false); delay(1000); testanimate(logo_bmp, LOGO_WIDTH, LOGO_HEIGHT); // Animate bitmaps } void loop() { } void testdrawline() { int16_t i; display.clearDisplay(); // Clear display buffer for(i=0; i<display.width(); i+=4) { display.drawLine(0, 0, i, display.height()-1, SSD1306_WHITE); display.display(); // Update screen with each newly-drawn line delay(1); } for(i=0; i<display.height(); i+=4) { display.drawLine(0, 0, display.width()-1, i, SSD1306_WHITE); display.display(); delay(1); } delay(250); display.clearDisplay(); for(i=0; i<display.width(); i+=4) { display.drawLine(0, display.height()-1, i, 0, SSD1306_WHITE); display.display(); delay(1); } for(i=display.height()-1; i>=0; i-=4) { display.drawLine(0, display.height()-1, display.width()-1, i, SSD1306_WHITE); display.display(); delay(1); } delay(250); display.clearDisplay(); for(i=display.width()-1; i>=0; i-=4) { display.drawLine(display.width()-1, display.height()-1, i, 0, SSD1306_WHITE); display.display(); delay(1); } for(i=display.height()-1; i>=0; i-=4) { display.drawLine(display.width()-1, display.height()-1, 0, i, SSD1306_WHITE); display.display(); delay(1); } delay(250); display.clearDisplay(); for(i=0; i<display.height(); i+=4) { display.drawLine(display.width()-1, 0, 0, i, SSD1306_WHITE); display.display(); delay(1); } for(i=0; i<display.width(); i+=4) { display.drawLine(display.width()-1, 0, i, display.height()-1, SSD1306_WHITE); display.display(); delay(1); } delay(2000); // Pause for 2 seconds } void testdrawrect(void) { display.clearDisplay(); for(int16_t i=0; i<display.height()/2; i+=2) { display.drawRect(i, i, display.width()-2*i, display.height()-2*i, SSD1306_WHITE); display.display(); // Update screen with each newly-drawn rectangle delay(1); } delay(2000); } void testfillrect(void) { display.clearDisplay(); for(int16_t i=0; i<display.height()/2; i+=3) { // The INVERSE color is used so rectangles alternate white/black display.fillRect(i, i, display.width()-i*2, display.height()-i*2, SSD1306_INVERSE); display.display(); // Update screen with each newly-drawn rectangle delay(1); } delay(2000); } void testdrawcircle(void) { display.clearDisplay(); for(int16_t i=0; i<max(display.width(),display.height())/2; i+=2) { display.drawCircle(display.width()/2, display.height()/2, i, SSD1306_WHITE); display.display(); delay(1); } delay(2000); } void testfillcircle(void) { display.clearDisplay(); for(int16_t i=max(display.width(),display.height())/2; i>0; i-=3) { // The INVERSE color is used so circles alternate white/black display.fillCircle(display.width() / 2, display.height() / 2, i, SSD1306_INVERSE); display.display(); // Update screen with each newly-drawn circle delay(1); } delay(2000); } void testdrawroundrect(void) { display.clearDisplay(); for(int16_t i=0; i<display.height()/2-2; i+=2) { display.drawRoundRect(i, i, display.width()-2*i, display.height()-2*i, display.height()/4, SSD1306_WHITE); display.display(); delay(1); } delay(2000); } void testfillroundrect(void) { display.clearDisplay(); for(int16_t i=0; i<display.height()/2-2; i+=2) { // The INVERSE color is used so round-rects alternate white/black display.fillRoundRect(i, i, display.width()-2*i, display.height()-2*i, display.height()/4, SSD1306_INVERSE); display.display(); delay(1); } delay(2000); } void testdrawtriangle(void) { display.clearDisplay(); for(int16_t i=0; i<max(display.width(),display.height())/2; i+=5) { display.drawTriangle( display.width()/2 , display.height()/2-i, display.width()/2-i, display.height()/2+i, display.width()/2+i, display.height()/2+i, SSD1306_WHITE); display.display(); delay(1); } delay(2000); } void testfilltriangle(void) { display.clearDisplay(); for(int16_t i=max(display.width(),display.height())/2; i>0; i-=5) { // The INVERSE color is used so triangles alternate white/black display.fillTriangle( display.width()/2 , display.height()/2-i, display.width()/2-i, display.height()/2+i, display.width()/2+i, display.height()/2+i, SSD1306_INVERSE); display.display(); delay(1); } delay(2000); } void testdrawchar(void) { display.clearDisplay(); display.setTextSize(1); // Normal 1:1 pixel scale display.setTextColor(SSD1306_WHITE); // Draw white text display.setCursor(0, 0); // Start at top-left corner display.cp437(true); // Use full 256 char 'Code Page 437' font // Not all the characters will fit on the display. This is normal. // Library will draw what it can and the rest will be clipped. for(int16_t i=0; i<256; i++) { if(i == '\n') display.write(' '); else display.write(i); } display.display(); delay(2000); } void testdrawstyles(void) { display.clearDisplay(); display.setTextSize(1); // Normal 1:1 pixel scale display.setTextColor(SSD1306_WHITE); // Draw white text display.setCursor(0,0); // Start at top-left corner display.println(F("Hello, world!")); display.setTextColor(SSD1306_BLACK, SSD1306_WHITE); // Draw 'inverse' text display.println(3.141592); display.setTextSize(2); // Draw 2X-scale text display.setTextColor(SSD1306_WHITE); display.print(F("0x")); display.println(0xDEADBEEF, HEX); display.display(); delay(2000); } void testscrolltext(void) { display.clearDisplay(); display.setTextSize(2); // Draw 2X-scale text display.setTextColor(SSD1306_WHITE); display.setCursor(10, 0); display.println(F("scroll")); display.display(); // Show initial text delay(100); // Scroll in various directions, pausing in-between: display.startscrollright(0x00, 0x0F); delay(2000); display.stopscroll(); delay(1000); display.startscrollleft(0x00, 0x0F); delay(2000); display.stopscroll(); delay(1000); display.startscrolldiagright(0x00, 0x07); delay(2000); display.startscrolldiagleft(0x00, 0x07); delay(2000); display.stopscroll(); delay(1000); } void testdrawbitmap(void) { display.clearDisplay(); display.drawBitmap( (display.width() - LOGO_WIDTH ) / 2, (display.height() - LOGO_HEIGHT) / 2, logo_bmp, LOGO_WIDTH, LOGO_HEIGHT, 1); display.display(); delay(1000); } #define XPOS 0 // Indexes into the 'icons' array in function below #define YPOS 1 #define DELTAY 2 void testanimate(const uint8_t *bitmap, uint8_t w, uint8_t h) { int8_t f, icons[NUMFLAKES][3]; // Initialize 'snowflake' positions for(f=0; f< NUMFLAKES; f++) { icons[f][XPOS] = random(1 - LOGO_WIDTH, display.width()); icons[f][YPOS] = -LOGO_HEIGHT; icons[f][DELTAY] = random(1, 6); Serial.print(F("x: ")); Serial.print(icons[f][XPOS], DEC); Serial.print(F(" y: ")); Serial.print(icons[f][YPOS], DEC); Serial.print(F(" dy: ")); Serial.println(icons[f][DELTAY], DEC); } for(;;) { // Loop forever... display.clearDisplay(); // Clear the display buffer // Draw each snowflake: for(f=0; f< NUMFLAKES; f++) { display.drawBitmap(icons[f][XPOS], icons[f][YPOS], bitmap, w, h, SSD1306_WHITE); } display.display(); // Show the display buffer on the screen delay(200); // Pause for 1/10 second // Then update coordinates of each flake... for(f=0; f< NUMFLAKES; f++) { icons[f][YPOS] += icons[f][DELTAY]; // If snowflake is off the bottom of the screen... if (icons[f][YPOS] >= display.height()) { // Reinitialize to a random position, just off the top icons[f][XPOS] = random(1 - LOGO_WIDTH, display.width()); icons[f][YPOS] = -LOGO_HEIGHT; icons[f][DELTAY] = random(1, 6); } } } }
 -
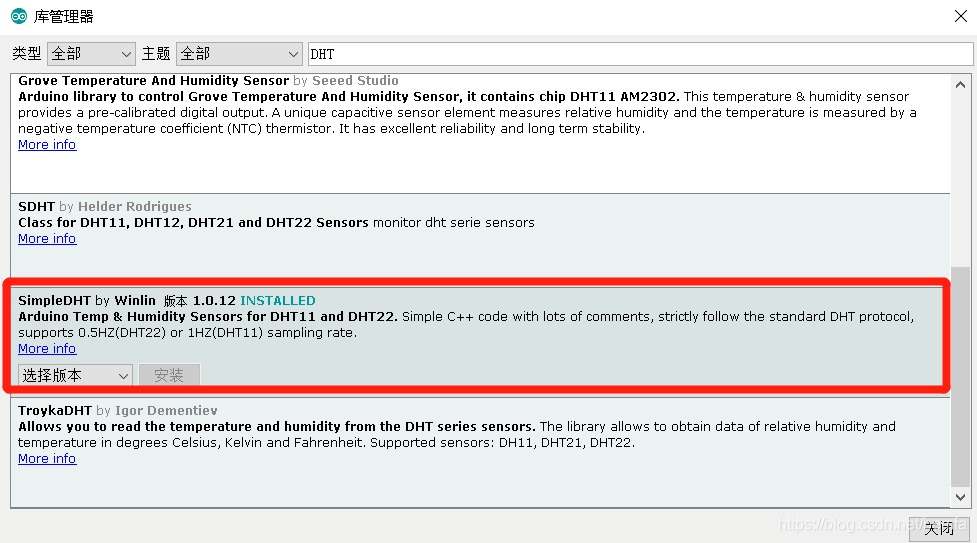
 ESP8266使用DHT11传感器读取温湿度数据 esp8266和温湿度传感器接线引脚图:DHT11ESP8266VCC3.3VGNDGNDDATAGPIO2准备工作: 在 Arduino IDE上方选项处-> 工具—>管理库,然后搜索dht11,安装如图所示库: 示例程序:#include <SimpleDHT.h> // for DHT11, // VCC: 5V or 3V // GND: GND // DATA: 2 int pinDHT11 = 2; SimpleDHT11 dht11(pinDHT11); void setup() { Serial.begin(115200); } void loop() { // start working... Serial.println("================================="); Serial.println("Sample DHT11..."); // read without samples. byte temperature = 0; byte humidity = 0; int err = SimpleDHTErrSuccess; if ((err = dht11.read(&temperature, &humidity, NULL)) != SimpleDHTErrSuccess) { Serial.print("Read DHT11 failed, err="); Serial.print(SimpleDHTErrCode(err)); Serial.print(","); Serial.println(SimpleDHTErrDuration(err)); delay(1000); return; } Serial.print("Sample OK: "); Serial.print((int)temperature); Serial.print(" *C, "); Serial.print((int)humidity); Serial.println(" H"); // DHT11 sampling rate is 1HZ. delay(1500); }串口输出如图所示:
 -

-
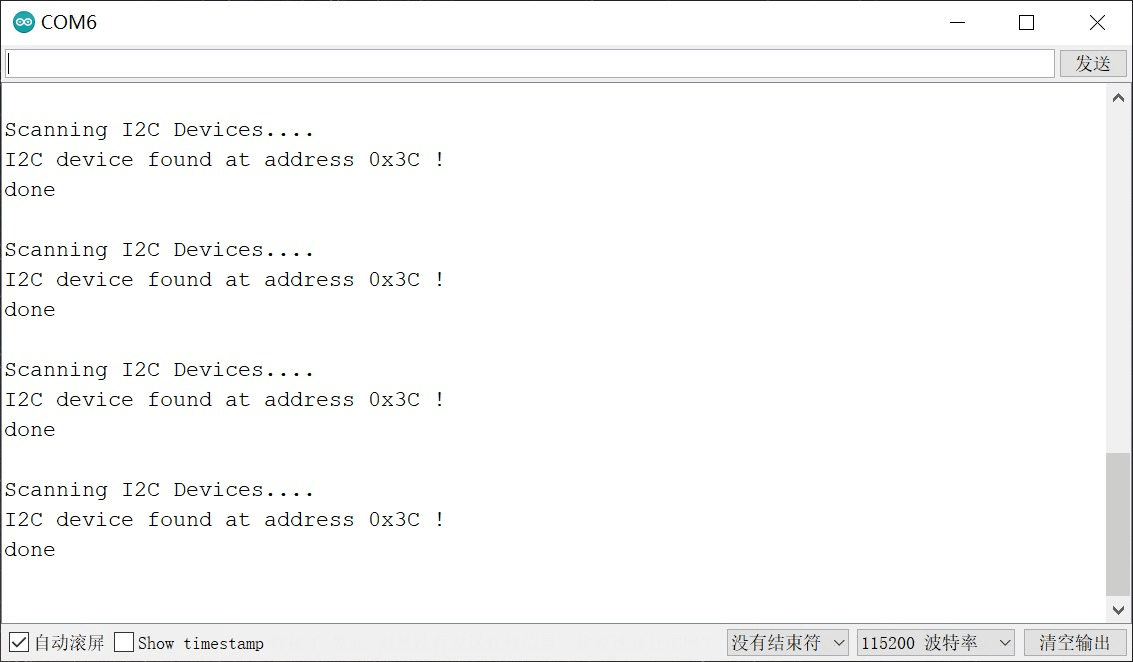
 ESP8266获取外设IIC地址 使用Arduino IDE,获取ESP8266外设IIC地址并打印输出到串口示例程序{lamp/}#include <Wire.h> void setup() { // 模拟I2C总线为GPIO0和GPIO2,初始化 Wire.begin(0,2); // 初始化调试串口波特率 Serial.begin(115200); } void loop() { byte error, address; int nDevices; // 串口输出调试信息 Serial.println("Scanning I2C Devices...."); nDevices = 0; for (address = 1; address < 127; address++ ) { // The i2c_scanner uses the return value of // the Write.endTransmisstion to see if // a device did acknowledge to the address. // 发送1次从机地址 Wire.beginTransmission(address); // 等待从机响应 error = Wire.endTransmission(); if (error == 0) { Serial.print("I2C device found at address 0x"); // 显示当前查询的从机地址 if (address < 16) { Serial.print("0"); } Serial.print(address, HEX); Serial.println(" !"); // 找到的从机数量自增 nDevices++; } else if (error == 4) { Serial.print("Unknow error at address 0x"); if (address < 16) Serial.print("0"); Serial.println(address, HEX); } } // 所有从机地址遍历完毕 if (nDevices == 0) Serial.println("No I2C devices found\n"); else Serial.println("done\n"); delay(5000); // wait 5 seconds for next scan }演示效果 {alert type="warning"} ❗ 注:使用wire库,通过Wire.begin(SDA,SCL)这一句来使用软件IIC引脚{/alert}
 -
 ESP8266基础按键使用 按键输入使用示例int buttonState = 0; // 设置初始状态为0低电平 void setup() { pinMode(LED_BUILTIN, OUTPUT);//设置LED灯为输出模式 pinMode(0, INPUT);//设置GPIO 0为输入模式 } void loop() { buttonState = digitalRead(0);//读取GPIO 0的电平 if (buttonState == LOW) {//低电平LED亮,高电平LED灭 digitalWrite(LED_BUILTIN,LOW); } else { digitalWrite(LED_BUILTIN, HIGH); } }


