


使用Arduino IDE,获取ESP8266外设IIC地址并打印输出到串口
示例程序
#include <Wire.h>
void setup() {
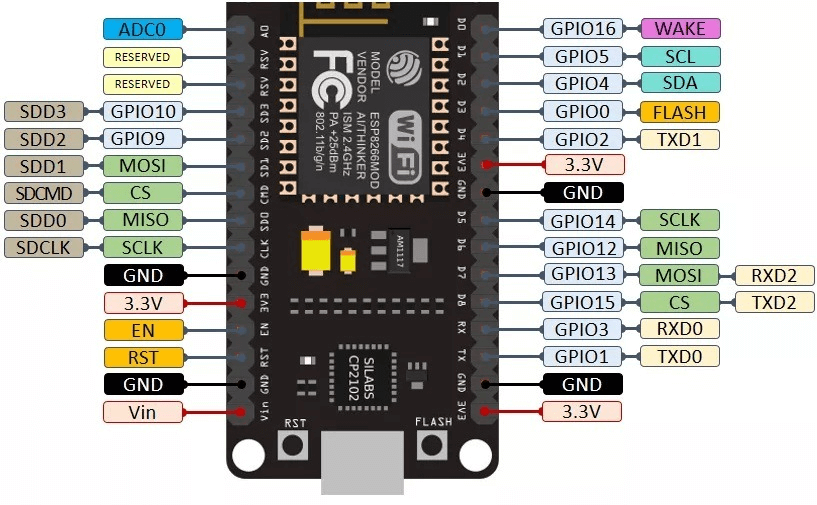
// 模拟I2C总线为GPIO0和GPIO2,初始化
Wire.begin(0,2);
// 初始化调试串口波特率
Serial.begin(115200);
}
void loop() {
byte error, address;
int nDevices;
// 串口输出调试信息
Serial.println("Scanning I2C Devices....");
nDevices = 0;
for (address = 1; address < 127; address++ ) {
// The i2c_scanner uses the return value of
// the Write.endTransmisstion to see if
// a device did acknowledge to the address.
// 发送1次从机地址
Wire.beginTransmission(address);
// 等待从机响应
error = Wire.endTransmission();
if (error == 0) {
Serial.print("I2C device found at address 0x");
// 显示当前查询的从机地址
if (address < 16)
{
Serial.print("0");
}
Serial.print(address, HEX);
Serial.println(" !");
// 找到的从机数量自增
nDevices++;
} else if (error == 4) {
Serial.print("Unknow error at address 0x");
if (address < 16)
Serial.print("0");
Serial.println(address, HEX);
}
}
// 所有从机地址遍历完毕
if (nDevices == 0)
Serial.println("No I2C devices found\n");
else
Serial.println("done\n");
delay(5000); // wait 5 seconds for next scan
}演示效果

本文共 110 个字数,平均阅读时长 ≈ 1分钟

评论 (0)